There are a variety of social media tools I use for clients. But hands down, BundlePost is the one I can’t live without.
I met the founder and creator, Robert Caruso, on Twitter about three years ago. He was immediately helpful and insightful about social media. And even though BundlePost was already available in Beta, he never pushed it. In fact, I was the one to initiate that conversation.
The idea for BundlePost originated out of a pain Robert saw within his marketing agency.
They spent an excessive amount of time gathering quality content, and he knew that time should be spent engaging – one of the most important factors in growing an online community.
Robert partnered up with his best friend and father, hired a developer, and a rough sketch of BundlePost was born. BP became fully operational about a year ago, but there are regular feature additions.
It has been incredible to watch BundlePost develop, and I am fortunate to be a user. BP saves my business a considerable amount of time on a daily basis.
In this tutorial, you learn how to set up a BundlePost account, and then I share my process for uploading Twitter content into Hootsuite.
Set up a BundlePost account.
1. Schedule. This is the first step to take when starting a new BundlePost account. Click on Add Schedule, name it, and save. It will appear on the list. Click on the blue icon next to the red X, and add in your specified times for that schedule. Choose a beginning and ending time, and at which intervals they will publish. Single or multiple times can be added or deleted.
Action steps: Create clear schedule names. Whether it’s for your personal brand or clients, make them easy to recognize.
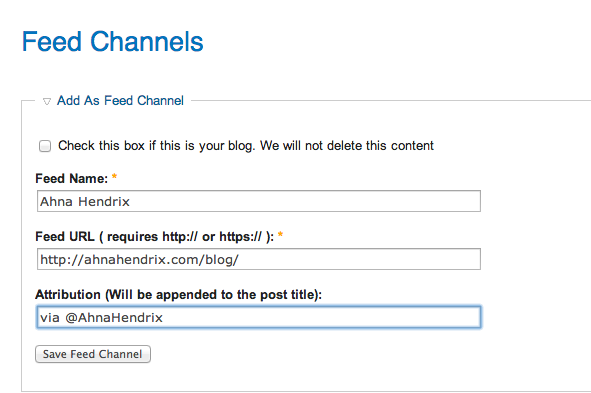
2. Create content Feeds. Click on Feeds and add a Feed Channel (RSS feed) or Create a Bundle Feed, which is BP’s feed generator. A RSS feed may take up to 24 hours to generate content, but the Bundle Feed can immediately be tested and saved. Testing a feed is wise because it ensures quality content will be generated.
Action steps: Watch the BundlePost video tutorials first. Then be sure to choose clear and concise keyboards for your feeds, i.e. social media.
3. Add in My Content. These content pieces are all about you or your clients. This is content directly related to your brand or a client’s brand. It can be blog posts, pictures, videos, RSS feeds – anything with a link.
Action steps: Don’t forget to create requests for people to join you on social platforms (i.e. Are we connected on LinkedIn? Let’s make it happen!).
4. Create Hashtag folders. These folders can be built for multiple clients or divided by subject i.e. sports, art, or music.
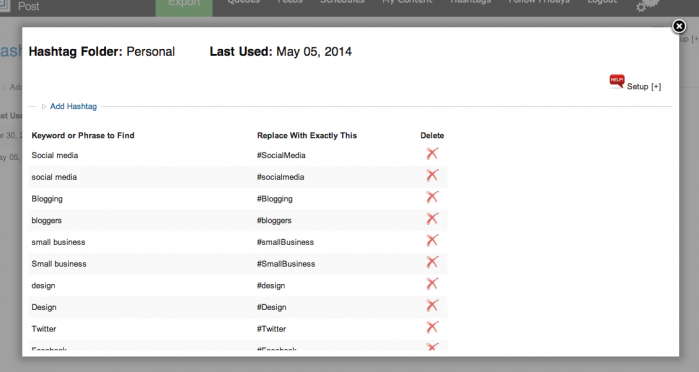
Create a Hashtag folder, name it and save. Just like the Feed creation, click on the blue icon and click Add Hashtag. Choose which client or subject they will be directed towards, essentially naming it. Then add a phase with the phase hashtagged below it.
Action steps: Add both lower case and upper case words that might be represented both ways, ex. sports –> Sports. And keep the keywords simple i.e. Instagram –> #Instagram.
5. Add Follow Friday content. Click on Add A Follow Friday Folder, enter the client name or Feed it will be used with. And add in content. There’s no need to add a hashtag to every entry IF you have #FF added to the hashtag folder.
Action steps: Mix it up and continually add new #FF content to promote your favorites of the week.
6. BundlePost Chrome extension: Bundlet. In the words from BundlePost, it offers “real-time content discovery through your Chrome browser.” The content marked is uploaded directly to a Queues folder and can be added in with content. It’s awesome – check it out.
My Twitter/Hootsuite Scheduling Process
1. Sign in. Head over to Bundlepost.com.
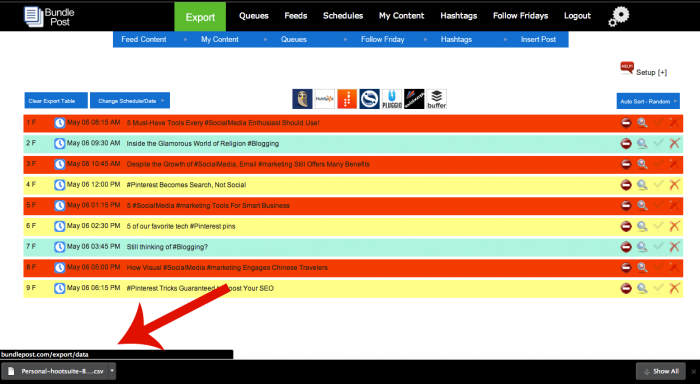
2. Export. Chose the date and Schedule to be published.
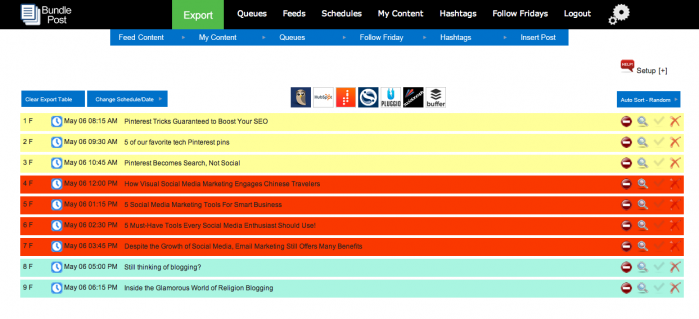
3. Choose a Feed topic and add content. Content subjects are divided by colors on the export table.
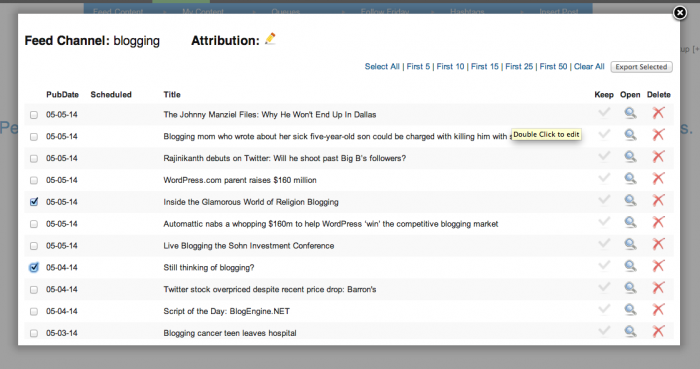
Tips: Articles can be opened by clicking on the magnifying glass. Headlines can be edited by double clicking on the text.
4. Add content from My Content folders.
5. Auto Sort. Shuffle up the color content boxes.
6. Hashtag it!! This used to take me SO long!
Tip: Last minute hashtags can be added at anytime during this process.
7. Export. Export via one of the 7 content management tools partnered with BP. I use Hootsuite. It downloads as a .CSV file.
Bonus: The file downloads as the Schedule name, so it’s easy to locate on your computer.
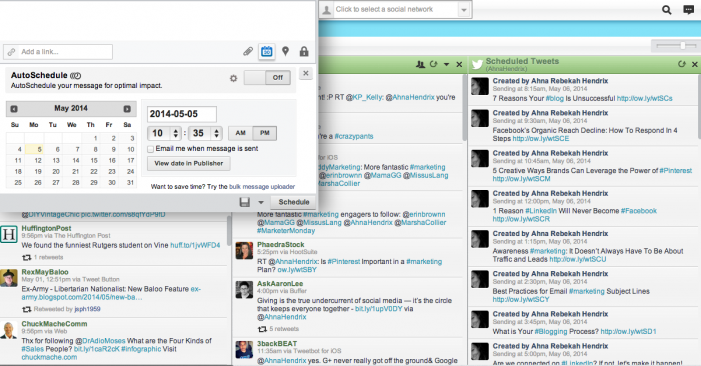
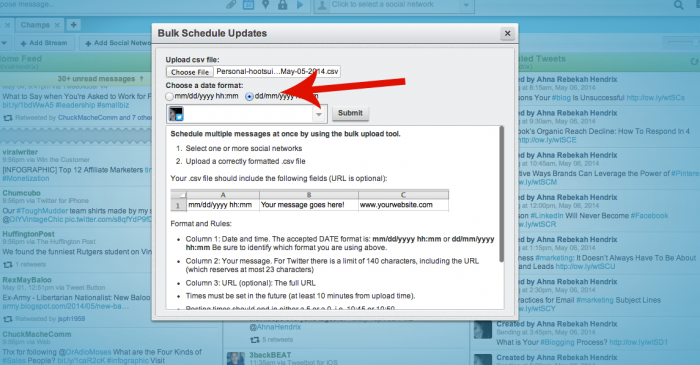
8. Upload export. Upload it to the chosen content management system. Use the correct date format.
9. And that’s it! Easy right? Once your content is chosen, it takes about 5 minutes to upload it.
Currently, BundlePost offers the ability to Bulk Upload to Hootsuite, Hubspot, Spredfast, Sendible, Plug.io, Buffer and Social Oomph, but will be adding social media management tools. And there are multiple ways to learn how to use BP with LIVE webinars, chat features, video tutorials, and blogs.
Disclaimer: I am not an affiliate of BundlePost, nor do I benefit from this writeup.
To stay up to date with BundlePost’s updates, sign up for their newsletter!


